What to Do When the Water Heater is Leaking
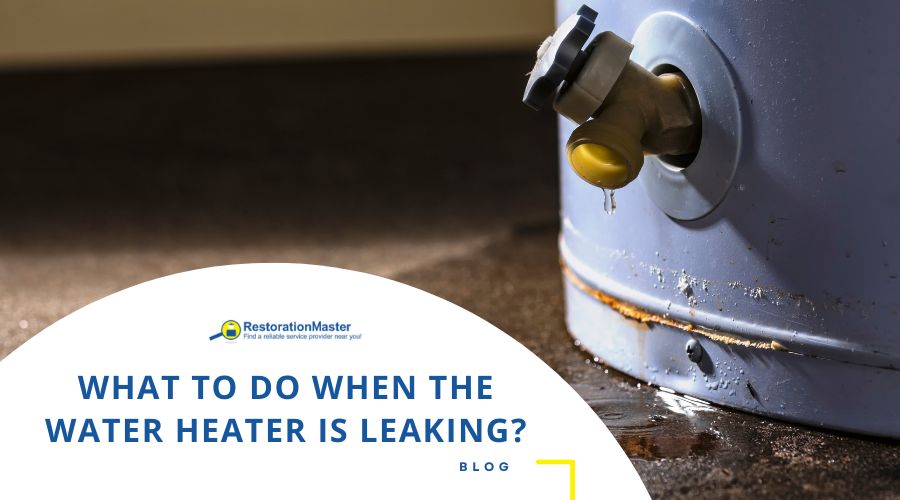
Water heaters are essential appliances in our homes, providing hot water for daily activities such as bathing, cleaning, and cooking. However, discovering a leak in your water heater can be both alarming and inconvenient. Leaks not only disrupt your household routines but also pose significant risks of water damage, increased utility bills, and potential health hazards. Understanding the causes of water heater leaks and knowing how to address them promptly can save you from costly repairs and ensure the longevity of your appliance.
In this comprehensive guide, we will explore the common reasons behind water heater leaks, step-by-step instructions on how to manage a leaking water heater, and preventive measures to avoid future issues.
Why Is My Water Heater Leaking?
Before diving into the steps to address a leak, it’s important to understand why your water heater might be leaking. Here are some common causes:
- Pressure Relief Valve Issues: The pressure relief valve is a safety feature that releases water if the pressure inside the tank gets too high. If it’s faulty or there’s too much pressure, it can start leaking.
- Drain Valve Problems: The drain valve, located at the bottom of the tank, can sometimes leak due to being loose or worn out.
- Corrosion: Over time, the tank can corrode, leading to small cracks and leaks.
- Loose Connections: The pipes and fittings connected to the water heater can become loose or worn, causing leaks.
- Sediment Buildup: Sediment can accumulate at the bottom of the tank, causing overheating and damage to the tank.
- Cracks in the Tank: Cracks in the tank due to age or manufacturing defects can cause leaks.
Step-by-Step Guide to Addressing a Leaking Water Heater
Water heaters can leak substantial amounts of water quickly, leading to serious damage if not addressed immediately. Here’s a detailed guide to help you manage a leaking water heater effectively.
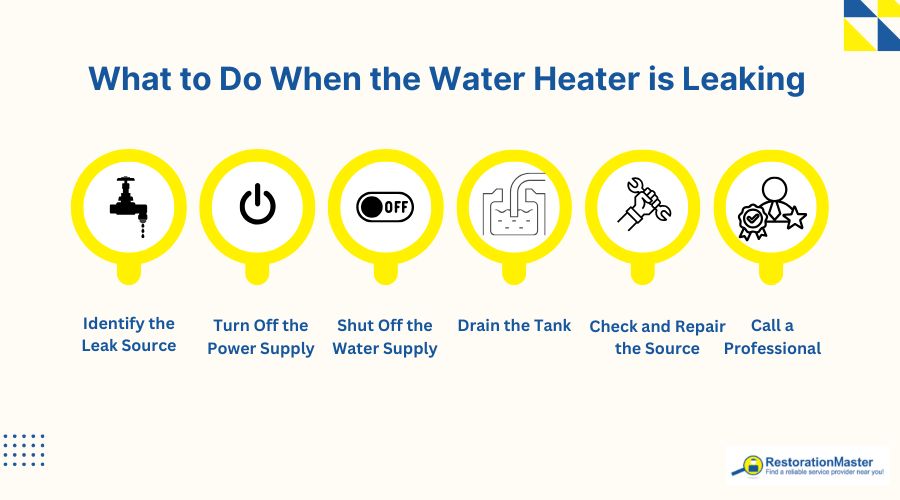
Step 1: Identify the Leak Source
Start by determining where the leak is coming from. Common sources include:
- Pressure Relief Valve: Located on the side or top of the heater, this valve releases excess pressure from the tank.
- Drain Valve: Found at the bottom of the tank, this valve is used for draining the tank during maintenanceMaintenance is the routine care, inspection, and repair of a... More.
- Tank: Look for signs of corrosion or cracks on the body of the tank itself.
- Pipes: Inspect the pipes connected to the heater for any visible leaks or loose connections.
Step 2: Turn Off the Power Supply
Safety is paramount. Before inspecting or fixing the leak, ensure the power supply is turned off:
- Electric Water Heaters: Locate the circuit breaker dedicated to the water heater and switch it off.
- Gas Water Heaters: Turn the gas valve to the “Off” position, usually found near the bottom of the tank. You may also need to turn off the gas supply to the entire house if there is no dedicated shut-off valve.
Step 3: Shut Off the Water Supply
Prevent further water damage by shutting off the water supply to the heater. The water shut-off valve is typically located above the water heater on the cold water line. Turn it clockwise to close it. This stops the inflow of water into the heater, minimizing the risk of additional leakage.
Step 4: Drain the Tank
To inspect the problem more thoroughly or prepare for repairs, you may need to drain the tank:
- Attach a Garden Hose: Connect a garden hose to the drain valve at the bottom of the heater.
- Direct the Hose: Run the hose to a floor drain or outside to safely expel the water.
- Open the Drain Valve: Open the valve and allow the tank to empty. This may take several minutes depending on the size of the tank.
Step 5: Check and Repair the Source
Now that the tank is empty, you can more easily identify and repairRepair is the act of fixing or restoring damaged property, m... More the source of the leak:
Pressure Relief Valve
-
- Check: If water is leaking from the pressure relief valve, it may be releasing excess pressure.
- RepairRepair is the act of fixing or restoring damaged property, m... More: Try lifting the valve’s lever to flush it and clear any debris. If it continues to leak, the valve may need to be replaced. Ensure you purchase the correct type of valve for your model.
Drain Valve
- Check: Ensure the drain valve is fully closed. Sometimes it can be slightly open and cause leaks.
- RepairRepair is the act of fixing or restoring damaged property, m... More: If the valve is faulty, replace it by unscrewing the old valve and installing a new one. Use Teflon tape on the threads for a secure fit.
Tank
- Check: Inspect the tank for any visible signs of corrosion or cracks.
- RepairRepair is the act of fixing or restoring damaged property, m... More: Unfortunately, if the tank itself is leaking, the entire water heater will likely need to be replaced. Consult a professional for the best replacement options.
Pipes
- Check: Look for leaks in the pipes connected to the heater.
- RepairRepair is the act of fixing or restoring damaged property, m... More: Tighten any loose connections. If a pipe is damaged, you may need to replace it. Use pipe tape or sealant to ensure a leak-free connection.
Step 6: Call a Professional
If you’re unable to identify or fix the leak, it’s time to call a professional plumber. A licensed plumber can accurately diagnose the problem and recommend the best course of action, whether it’s a simple repairRepair is the act of fixing or restoring damaged property, m... More or replacing the entire water heater.
Step 7: Prevent Future Leaks
To prevent future leaks, consider the following maintenanceMaintenance is the routine care, inspection, and repair of a... More tips:
- Regular Inspections: Check your water heater and connections regularly for any signs of wear or leaks. This can help you catch small issues before they become major problems.
- Flush the Tank Annually: Flushing the tank once a year can remove sediment buildup that causes corrosion. This involves draining the tank and then refilling it to wash out any accumulated sediment.
- Test Pressure Relief Valve: Test the pressure relief valve every six months to ensure it’s working correctly. Lift the lever and let it snap back to release a burst of water into the overflow tube. If it doesn’t, it may need to be replaced.
Benefits of New Water Heaters
New water heaters are increasingly energy-efficient than old water heaters, which means your new unit will likely reduce your utility bills compared to your old one. The internet offers numerous resourcesResources include tools, personnel, equipment, and materials... More to help you find the right water heater. Look for a model that is energy-efficient and has enough capacity to meet your family’s needs. You might also consider a tankless water heater, which provides on-demand hot water. Although these units are more expensive than conventional ones, you’ll never run out of hot water in the middle of a shower again.
Water Damage Cleanup Services
If your water heater leaks and causes a flood, it’s important to act quickly to minimize the damage. Contact the water damage restoration experts at RestorationMaster. Our experienced team will promptly assess the situation, extract the standing water, and thoroughly dry the affected area to prevent moldMold is a type of fungus that grows in damp or humid conditi... More growth and structural damage. Using advanced equipment and techniques, we’ll restore your property to its original condition, ensuring it’s safe and clean. Don’t let water damage disrupt your life—reach out to RestorationMaster for professional and efficient water damage cleanup services.

