Step-by-Step Guide to Removing Mold from Wood Floors
If you’ve discovered moldMold is a type of fungus that grows in damp or humid conditi... More on your wood floors, you’re probably feeling a bit overwhelmed. MoldMold is a type of fungus that grows in damp or humid conditi... More can be sneaky—it appears out of nowhere and can spread quickly, not only ruining the look of your beautiful wood floors but also posing potential health risks. But don’t panic! MoldMold is a type of fungus that grows in damp or humid conditi... More removal isn’t as complicated as it seems, and with the right steps, you can get your floors looking great again.
In this guide, we’ll walk you through how to safely and effectively remove moldMold is a type of fungus that grows in damp or humid conditi... More from wood floors. Whether it’s a small patch or a bigger issue, we’ve got you covered with everything from the tools you’ll need to the methods that work best. So, if you’re ready to tackle that moldMold is a type of fungus that grows in damp or humid conditi... More and keep it from coming back, keep reading!
Why Does Mold Appear on Wood Floors?
MoldMold is a type of fungus that grows in damp or humid conditi... More loves damp, humid environments. Areas with high moisture—like basements, bathrooms, or kitchens—are prime spots for moldMold is a type of fungus that grows in damp or humid conditi... More growth on wood floors. If your floors have been exposed to water leaks, spills, or high humidityHumidity is the amount of moisture or water vapor present in... More, you’re at risk. MoldMold is a type of fungus that grows in damp or humid conditi... More thrives on moisture and organic materialsOrganic materials are derived from living organisms, such as... More like wood, which makes it easy for it to spread if left unchecked.
Once moldMold is a type of fungus that grows in damp or humid conditi... More starts showing up on your floors, it’s not just an eyesore—it can leadLead is a heavy metal that can be toxic to humans, especiall... More to permanent damage like warpingWarping is the bending, twisting, or distortion of materials... More or staining. Plus, moldMold is a type of fungus that grows in damp or humid conditi... More can cause health issues, especially if it’s disturbed. So, it’s important to deal with it as soon as possible.
What You’ll Need To Remove Mold?
- Rubber gloves
- A mask (to avoid inhaling moldMold is a type of fungus that grows in damp or humid conditi... More sporesSpores are microscopic reproductive units of fungi or mold t... More)
- White vinegar or hydrogen peroxide
- Baking soda (optional, but helps for tough spots)
- A soft-bristled brush or spongeA sponge is a porous material used to absorb liquids or clea... More
- Clean towels
- A bucket of warm water
- A vacuum with a HEPA filter (optional)
- Wood floor cleaner (optional)
How to Remove Mold From Wooden Floors
Get Ready with Safety Gear
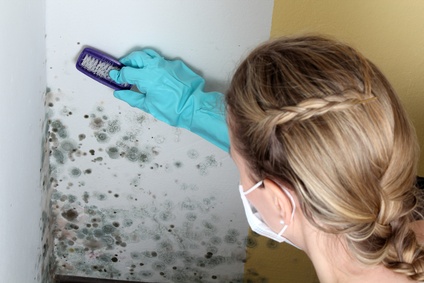
Before you start, make sure you’re properly protected. MoldMold is a type of fungus that grows in damp or humid conditi... More sporesSpores are microscopic reproductive units of fungi or mold t... More can get into the air and make you sick, so wear gloves, a mask, and protective eyewear.
Identify the Mold
Take a close look at the affected areas. MoldMold is a type of fungus that grows in damp or humid conditi... More can appear as dark spots or even look fuzzy, and you might notice a musty smell in the air. It’s easy to spot on lighter wood floors, but it can also show up in less obvious places, like in cracks or underneath furniture. If the moldMold is a type of fungus that grows in damp or humid conditi... More is widespread or deep in the wood, it might be time to call in a professional mold remediation expert.
Prepare Your Mold Removal Solution
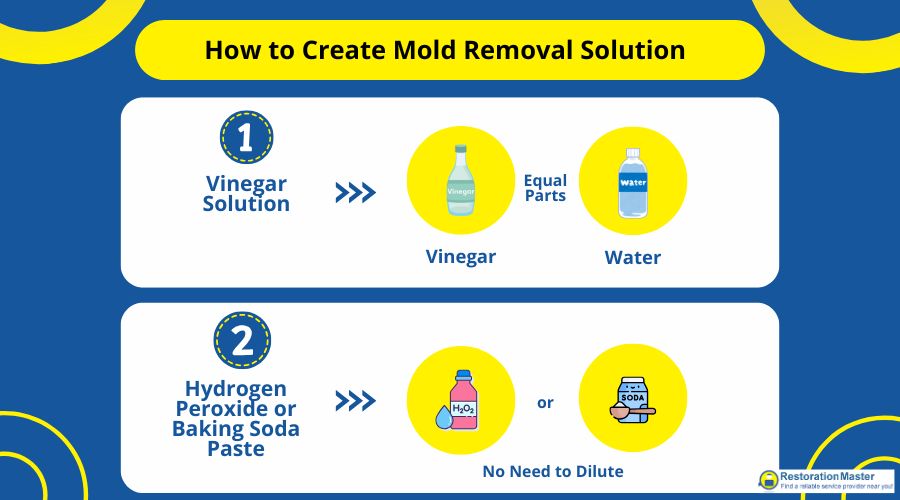
You don’t need fancy chemicals to tackle moldMold is a type of fungus that grows in damp or humid conditi... More. Both white vinegar and hydrogen peroxide are natural moldMold is a type of fungus that grows in damp or humid conditi... More fighters. You can use them on their own or mix them with water:
- Vinegar SolutionA solution is a homogeneous mixture of two or more substance... More: Mix equal parts vinegar and water.
- Hydrogen Peroxide: Pour it directly into a spray bottle (no need to dilute).
If you’re dealing with stubborn moldMold is a type of fungus that grows in damp or humid conditi... More, a baking soda paste can help. Just mix water and baking soda to form a paste, then apply it to the moldy spots.
Apply the Cleaning Solution
Spray or apply the solutionA solution is a homogeneous mixture of two or more substance... More directly to the moldy areas and let it sit for about 10 to 15 minutes. This gives the solutionA solution is a homogeneous mixture of two or more substance... More time to break down the moldMold is a type of fungus that grows in damp or humid conditi... More. Don’t be shy—cover the moldy spots thoroughly.
Scrub the Mold
After the solutionA solution is a homogeneous mixture of two or more substance... More has had time to work, grab a soft-bristled brush or spongeA sponge is a porous material used to absorb liquids or clea... More and gently scrub away the moldMold is a type of fungus that grows in damp or humid conditi... More. Be careful not to scrub too hard, as that can damage the wood. For more stubborn spots, you may need to repeat the process.
Rinse and Dry
Once the moldMold is a type of fungus that grows in damp or humid conditi... More is gone, take a clean, damp cloth and wipe down the area to remove any excess solutionA solution is a homogeneous mixture of two or more substance... More. Be sure to dry the floor right away with a clean towel. MoldMold is a type of fungus that grows in damp or humid conditi... More thrives in moisture, so it’s essential to keep the wood as dry as possible after cleaning.
Prevent Future Mold Growth
Now that your wood floor is mold-free, it’s time to prevent it from coming back. Start by fixing whatever caused the moisture buildup in the first place. This could be a leaky pipe, a broken seal around a window, or simply too much humidityHumidity is the amount of moisture or water vapor present in... More in the room.
Using a dehumidifierA dehumidifier is a device that removes excess moisture from... More in high-moisture areas like basements or bathrooms can help keep the air dry. Also, ensure there’s enough ventilation—especially in rooms where moisture can linger, like kitchens and bathrooms. Once the area is completely dry, consider applying a mold-resistant sealant to protect the floor from future moldMold is a type of fungus that grows in damp or humid conditi... More growth.
Long-Term Care Tips to Protect Your Wood Floors from Mold
- Control HumidityHumidity is the amount of moisture or water vapor present in... More: Keep your indoor humidityHumidity is the amount of moisture or water vapor present in... More levels between 30% and 50%. If you live in a humid area, you may want to use a dehumidifierA dehumidifier is a device that removes excess moisture from... More in rooms that are prone to moisture.
- Regularly Clean Your Floors: Dust and dirt can trap moisture, making it easier for moldMold is a type of fungus that grows in damp or humid conditi... More to grow. Wipe down your floors regularly and use a wood-friendly cleaner.
- Fix Leaks ASAP: If you spot a leak, repairRepair is the act of fixing or restoring damaged property, m... More it immediately. The longer water sits, the higher the chance moldMold is a type of fungus that grows in damp or humid conditi... More has to grow.
If the moldMold is a type of fungus that grows in damp or humid conditi... More covers a large area or if it’s deep within the wood, you might need a professional mold removal service. MoldMold is a type of fungus that grows in damp or humid conditi... More can sometimes be tricky to fully remove without the right equipment, especially if it’s infiltrated deeper into the wood. In these cases, it’s best to get help from the experts who can handle the problem safely and effectively.

