Step-by-Step Guide on How to Fix a Laminate Floor that Got Wet
Laminate flooringLaminate flooring is a type of flooring made of multiple lay... More is a popular choice for most households because it is very durable, attractive and best of all, affordable. Compared with other types of flooring, it is one of the best options because it looks great and it can withstand some occasional spills.
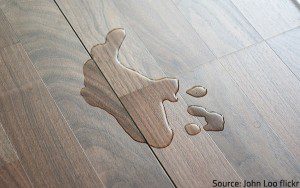
It’s hard to believe that water poses great dangers to your floors, isn’t it?
However, what would happen if a part of your laminate flooring has been submerged or flooded by water? No matter how durable your flooring is, floodingFlooding is the overflow or accumulation of water in areas t... More can cause significant water damage to your floor.
When your laminate flooringLaminate flooring is a type of flooring made of multiple lay... More gets saturated with water or any liquid, the planks will start to bend and buckle. It would make your laminate flooringLaminate flooring is a type of flooring made of multiple lay... More look hideous and it would become more damaged over time if you ignore it.
Good thing is that there are different ways you can repairRepair is the act of fixing or restoring damaged property, m... More your laminate flooringLaminate flooring is a type of flooring made of multiple lay... More after water damage. Lawrence from CivilClean.com will share with us some of the DIY methods that you can try.
DIY Tips to Fix Laminate Floor
1. Check and Stop Leaks
One reason your laminate floors can become flooded and soaked in water is from a leak of the pipes underneath it. Unless you are continuously spilling water on the same spot over and over again, laminate flooringLaminate flooring is a type of flooring made of multiple lay... More won’t get damaged easily. Standing water, however, can cause it significant damage.
The first step is to check if there are leaks in the laminate flooringLaminate flooring is a type of flooring made of multiple lay... More. Check for appliances that are near the damaged area. If it is close to dishwashers, washing machines and other appliances that are using water, you can check them out first to see if there are leaks.
You should also check the toilets and the pipes underneath the flooring. For this job, you need to look for a water damage professional to check. Ignoring the damage from the flooring can leadLead is a heavy metal that can be toxic to humans, especiall... More to more severe consequences, so if you can’t find the leak, ask for help from a professional.
Fixing the laminate flooringLaminate flooring is a type of flooring made of multiple lay... More without stopping the leaks will only make this worse, so make sure that you check and stop the leaks before you start the repairRepair is the act of fixing or restoring damaged property, m... More.
2. Prepare the Tools for Repair
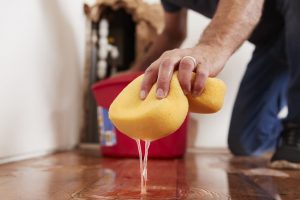 The next step is to prepare all of the tools that you will need to repairRepair is the act of fixing or restoring damaged property, m... More the laminate floor. Here are some of the things that you need:
- Safety glasses
- Putty knife
- Flooring adhesive
- Measuring tape
- Utility knife
- Pliers
- Hammer
- Cleaning solventA solvent is a liquid capable of dissolving other substances... More
- Replacement underlayment material
Aside from all these tools, you will need to prepare new laminate planks that match the design of the floor. You will need to replace all of the damaged planks, so it won’t be a good idea to simply find any design.
It is pretty difficult to find matching laminate planks so you should go to the store where you bought the laminate planks and show them the design. If you can’t find the designs anywhere, you can always look for it online.
3. Remove the Damaged Planks
Once you’ve gathered all of the things that you are going to use, the next step is to remove the damaged planks. Make sure that you have already determined all of the damaged areas and that you bought the replacement planks before you remove them.
- Start by pulling the damaged planks carefully. Use the putty knife on the damaged edges.
- You have to remove the whole plank even if only a small part of it is damaged because it will get worse if you leave it there.
- Remove the whole plank to expose the floor beneath.
- Check the bare floor for signs of moldMold is a type of fungus that grows in damp or humid conditi... More and clean it before you start the installation of new planks.
4. Replace the Damaged Planks
This is the most challenging part of fixing a laminate floor because you need to make sure that you will use the same design for the laminate planks. If you’ve purchased extra planks during the installation of your laminate flooringLaminate flooring is a type of flooring made of multiple lay... More, then you won’t have any issues with the replacement.
However, if you did not buy any extras, you have to spend time searching for the design of the laminate floor. If the laminate floor has been installed for many years, there is a chance that the design that you are looking for is already phased out.
You can either choose a design that is almost similar to the design of your laminate floor or change your flooring completely. If there are a lot of damaged planks, you might think of a complete replacement, but if only a few of them are damaged, it could be very hard to find the appropriate design.
5. Installing the New Planks
Before you start the installation, check the bare flooring and make sure that it is cleaned. Check the replacement planks and see if they would fit perfectly on the bare floors.
After that, add some adhesive and start putting in the laminate planks. Put a heavy object on the new laminate and leave it there for a couple of hours until the adhesive dries up.
Ask for Professional Help
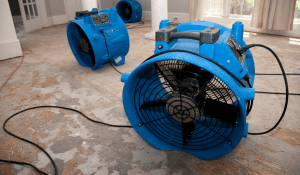 It is true that fixing laminate flooringLaminate flooring is a type of flooring made of multiple lay... More after getting drenched by water is extremely time-consuming and if you don’t know how to do this, you will cause more damage to your laminate floor.
You should know that there are professionals who are ready to help you in times of need. You can look for a water damage professional to handle the repairs. They can fix the root of the problem and they can replace your flooring professionally.
You don’t have to do it yourself and you won’t have to worry about messing up the installation. You just need to hire the professionals and your problem will be resolved in no time.
Conclusion
Fixing a laminate floor can be done even without the help of professionals. If you have the time to do it and you know how to install laminate flooringLaminate flooring is a type of flooring made of multiple lay... More, you can do the task on your own and replace it.
You just have to follow all of the tips mentioned above and you won’t have any issues with your laminate floor. If you plan to replace your laminate floor completely, make sure to buy extra planks so you won’t have to spend a lot of time searching if you experience another problem with the flooring.

