5 Best Ways to Use a Miter Saw to Cut Moulding
Mouldings are strips of material that cover up the transition between surfaces. Besides being used for aesthetic purposes, decorative moulding can also help protect your walls from bumps and kicks. Baseboards, also known as base mouldings, are used to soften the transition between the floor and the wall while crown mouldings do the same for the transition between the ceiling and wall.
Mouldings can help you accessorize your house. But, installing a moulding can be quite challenging, especially for beginners. Mouldings can be cut using either a miter or circular saw, but the former is better than the latter when dealing with moulding. A reliable compound miter saw is ideal for cutting mouldings since they can make angled cuts. With a circular saw, you will have to measure your angles using a speed square before cutting, which can be tedious. So here are five ways to cut moulding using a miter saw.
Cutting a Moulding Using Crown Stops
Before you even start making your miter cuts, you should identify the top and the bottom parts of the moulding. The top part of the moulding usually has the least amount of details. Remember, knowing the top and the bottom of moulding can help you make the right cuts. To make miter cuts, you should:

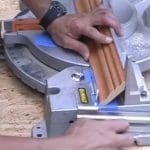
- Place your moulding on the working bench upside down, with the bottom part of the moulding leaning on the fence of your miter saw, and lock it with a crown stop.
- Make sure the bottom part of the moulding is leaning perfectly on the miter fence.
- Then, calibrate the miter saw by making sure the blade is at a 90-degree angle.
- For outside cuts, you will be making a 45-degree cut away from the top part of the moulding. So move your miter saw to 45-degrees and cut it.
- Repeat the same by moving the saw to the other side and then cut the moulding into two, and you are good to go.
Cutting Mouldings Without Using a Crown Stop or Jig
Most experienced individuals make miter cuts without a jig or crown stop. However, it can be a little bit tricky for a beginner. To accomplish this, you should:
-
- Start by placing pieces of tape on both sides of your miter saw’s base
- And then, put your moulding upside down on your miter saw with the bottom part of your moulding leaning perfectly on the fence.

- Draw your line on the pieces of tape using a sharp pencil.
- With your line ready, you can take your moulding and place it on the base of the miter saw.
- Make sure the top part of your moulding is on the line before making your cut.
- Next, move the blade to 45-degrees and make your cut, and repeat the same for the other side.
- The line can help you make several accurate cuts, but this process takes practice.
Cutting Moulding Pieces With a DIY Wooden Jig
If you don’t have a crown stopper and can’t make a cut without one, you should build an L-shaped jig. To make the jig, you should:
- Start by placing a piece of tape on the miter saw’s fence and the other one on the base.
- Next, put your moulding on the saw upside down and mark on the tape using a pencil
- Take the measurements from the base of the fence to where your two lines.
- You can use these measurements to make your L-shaped jig and add a stopper on top of the jig’s fence.
- With your jig ready, you can go ahead and make your cuts
- Put the jig in-front of the miter’s fence
- Then, place your moulding on top of the jig with the top side leaning on the jig’s fence and the bottom part supported by the saw’s fence.
- Make sure the top part of the moulding is leaning perfectly on the jig before making your cut.
Cutting Mouldings Using an Auxiliary Fence and a Secondary Base
Another method that can give you accurate cuts is adding an auxiliary wooden fence and base to help hold the moulding in place. You can start by:
- Add an auxiliary fence and secondary base to your miter bench, just make sure the auxiliary fence is taller than the miter fence and clamp it to the base of the miter saw.
- Next, place your moulding on the new base upside down.
- Make sure the back of the bottom part of the moulding is leaning on the fence before adding a stop. The stop will hold the moulding in place while you make your cuts.
- Finally, make 45-degrees cuts on your fence, base, and stopper and remove the middle part. By removing the middle section, you can see exactly where the blade will cut.
- With everything in place, you can start making your cuts.
Cutting Moulding Pieces With the Right Side Up
For most methods, you have to place the moulding upside down, which can be straightforward if you know the top and the bottom part of your pieces. However, there is a way you can make miter cuts without worrying about the size of your mouldings or knowing the moulding’s top and bottom. To make miter cuts with the moulding placed upright, you will have to:
- Build this jig by attaching a baseboard to the fence with a notch.
- Next, glue or screw the fence onto the base, and then add a thin stopper on top of the jig’s fence.
- Finally, you can put the jig in front of your miter’s bench and place your moulding on the bench with one side leaning on your jig and the other part on the base of your tool’s fence.
- Make sure the backside of the part leaning on the jig is locked straight and then make an outside cut.
- Repeat the process with the other side to create matching pieces of moulding, and you are good to go.
This jig can handle both smaller and bigger mouldings.
Although mouldings can help cover up those in-between areas. Sometimes, there’s work that needs to be done there as well before inserting the moulding. If you notice mildewMildew is a type of fungus that grows on damp surfaces, typi... More or moldMold is a type of fungus that grows in damp or humid conditi... More in these areas, do not hesitate to reach out to the Disaster RestorationRestoration is the process of returning a property to its pr... More experts at Rainbow International of McAllen!


