How to Prevent and Remove Mold from Storage Unit
A storage unit is meant to be a safe, secure space for your furniture, books, clothing, and other personal belongings. However, if moldMold is a type of fungus that grows in damp or humid conditi... More begins to grow, it can cause serious damage, leading to costly losses and even ruining irreplaceable sentimental items.
While moldMold is a type of fungus that grows in damp or humid conditi... More in storage units isn’t extremely common, it happens more often than many people realize. Learning how to prevent moldMold is a type of fungus that grows in damp or humid conditi... More growth and properly store your items can help protect your valuables and avoid expensive restorationRestoration is the process of returning a property to its pr... More or replacement costs.
Is Mold Common in Storage Units?
MoldMold is a type of fungus that grows in damp or humid conditi... More in storage units is not always expected, but it happens more often than you might think. A quick online search will reveal many cases where people have returned to their storage units only to find their belongings covered in moldMold is a type of fungus that grows in damp or humid conditi... More.
Since moldMold is a type of fungus that grows in damp or humid conditi... More thrives in moist, enclosed spaces, storage units—especially those without climate control—can become breeding grounds for moldMold is a type of fungus that grows in damp or humid conditi... More if conditions are right.
What Causes Mold Growth in Storage Units?
Several factors contribute to moldMold is a type of fungus that grows in damp or humid conditi... More infestations in storage units. Here are the most common causes:
1. High Humidity and Moisture Buildup
Moisture is the number one cause of moldMold is a type of fungus that grows in damp or humid conditi... More growth indoors. MoldMold is a type of fungus that grows in damp or humid conditi... More only needs two things to survive:
- Moisture (from humidityHumidity is the amount of moisture or water vapor present in... More, leaks, or damp items)
- An organic food source (like wood, paper, or fabric)
If your storage unit has high humidity levels, moldMold is a type of fungus that grows in damp or humid conditi... More growth is almost inevitable.
2. Improper Storage of Items
Many renters unknowingly use the wrong storage materials, increasing the risk of moldMold is a type of fungus that grows in damp or humid conditi... More. For example:
- Cardboard boxes work well for dry items but don’t protect clothing, shoes, or fabric-based items from moisture.
- Plastic containers with airtight lids provide better protection against moldMold is a type of fungus that grows in damp or humid conditi... More and pests.
Tip: Store items a few inches away from the walls and leave space between boxes to improve air circulation.
How to Remove Mold from a Storage Unit
If you discover moldMold is a type of fungus that grows in damp or humid conditi... More in your storage unit, it is important to act quickly. Here’s what you should do:
1. Identify the Source of Moisture
MoldMold is a type of fungus that grows in damp or humid conditi... More cannot grow without moisture. Before removing the moldMold is a type of fungus that grows in damp or humid conditi... More, find the source of the problem and fix it.
- Check for leaks in the ceiling, walls, or floor.
- Look for signs of high humidityHumidity is the amount of moisture or water vapor present in... More or condensation.
- If possible, use a dehumidifier to remove excess moisture.
2. Clean the Mold Safely
Before starting, wear protective gear, including gloves, goggles, and a face mask, to prevent exposure to moldMold is a type of fungus that grows in damp or humid conditi... More sporesSpores are microscopic reproductive units of fungi or mold t... More.
Here’s the Step-by-step mold removal process:
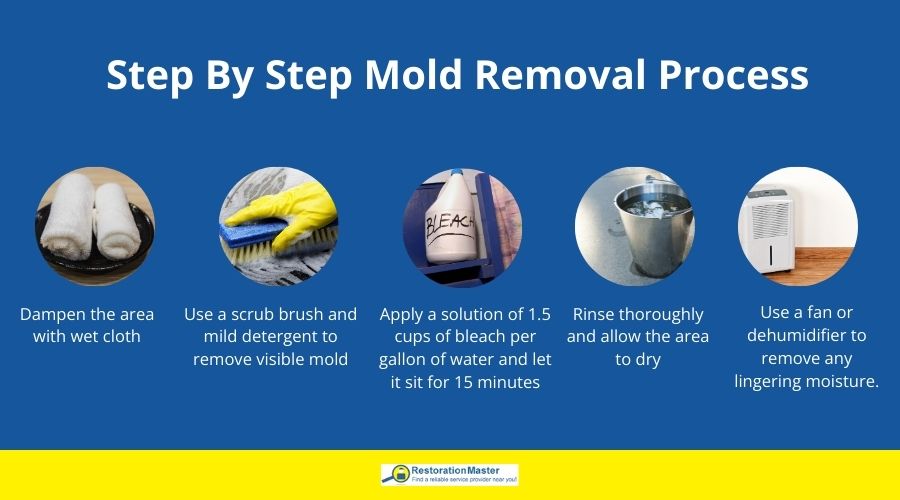
- Dampen the affected area with a wet cloth to prevent moldMold is a type of fungus that grows in damp or humid conditi... More sporesSpores are microscopic reproductive units of fungi or mold t... More from becoming airborne.
- Use a scrub brush and mild detergent to remove visible moldMold is a type of fungus that grows in damp or humid conditi... More.
- Apply a solutionA solution is a homogeneous mixture of two or more substance... More of 1.5 cups of bleach per gallon of water and let it sit for 15 minutes.
- Rinse thoroughly and allow the area to dry completely.
- Use a fan or dehumidifierA dehumidifier is a device that removes excess moisture from... More to remove any lingering moisture.
How to Prevent Mold Growth in Your Storage Unit
Preventing moldMold is a type of fungus that grows in damp or humid conditi... More is far easier and cheaper than dealing with an infestation. Follow these best practices to keep your belongings safe:
- Store Items Off the Ground: Moisture from the floor can seep into your belongings, leading to moldMold is a type of fungus that grows in damp or humid conditi... More growth. Use wooden pallets or shelving units to keep items elevated and avoid storing fabric-based items directly on the ground.
- Ensure All Items Are Completely Dry Before Storing: Even slightly damp items can spread moisture inside a storage unit. Let items air-dry in the sun before storing them and wipe down furniture, appliances, and boxes before moving them in.
- Control HumidityHumidity is the amount of moisture or water vapor present in... More Levels: MoldMold is a type of fungus that grows in damp or humid conditi... More thrives in high-humidity environments. Keep humidityHumidity is the amount of moisture or water vapor present in... More levels between 30%-50% to prevent moldMold is a type of fungus that grows in damp or humid conditi... More, use a humidityHumidity is the amount of moisture or water vapor present in... More gauge to monitor conditions, and consider renting a climate-controlled storage unit for added protection.
- Inspect the Storage Unit for MoldMold is a type of fungus that grows in damp or humid conditi... More Before Moving In: Before signing a storage contract, check for visible moldMold is a type of fungus that grows in damp or humid conditi... More growth on walls and floors, look for water stains, leaks, or musty odors, and ask for a different unit if you notice any red flags.
- Use Moisture-Absorbing Products: The right materials can help keep humidityHumidity is the amount of moisture or water vapor present in... More levels low inside your storage unit. Silica gel packets absorb excess moisture, charcoal bags help control humidityHumidity is the amount of moisture or water vapor present in... More and eliminate odors, and dehumidifiers (if allowed) can further reduce moisture levels.
Can Mold Grow in a Climate-Controlled Storage Unit?
A climate-controlled storage unit significantly reduces the risk of moldMold is a type of fungus that grows in damp or humid conditi... More but does not eliminate it completely. If damp items are placed inside, or if there is an unnoticed leak, moldMold is a type of fungus that grows in damp or humid conditi... More can still develop. To maximize protection, follow all standard moldMold is a type of fungus that grows in damp or humid conditi... More preventionPrevention refers to actions taken to reduce the likelihood ... More practices, even in climate-controlled spaces.
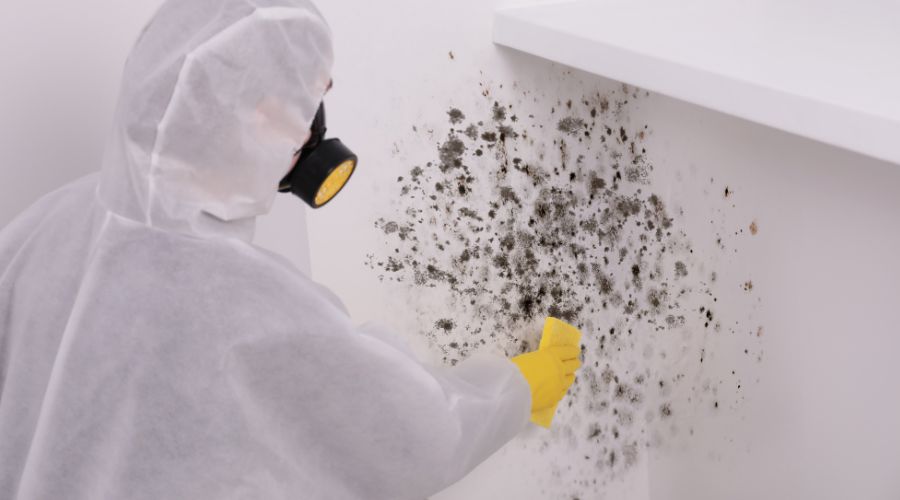
If you discover moldMold is a type of fungus that grows in damp or humid conditi... More in your storage unit, it’s important to act quickly. Professional restorationRestoration is the process of returning a property to its pr... More experts specialize in moldMold is a type of fungus that grows in damp or humid conditi... More removal and can assess the extent of the damage, identify the moisture source, and use advanced cleaning techniques to eliminate moldMold is a type of fungus that grows in damp or humid conditi... More safely. They can also treat affected surfaces with antimicrobial solutions to prevent future growth and, in some cases, restore salvageable items that have been contaminated. If moldMold is a type of fungus that grows in damp or humid conditi... More is spreading or causing damage, don’t wait—call a mold remediation specialist immediately to protect your belongings and prevent further deterioration.

