


Cleaning Mold from Electronics
Electronics contaminated with an outbreak of mold spores are an uncommon sight. Electronics, in general are far from being prone to mold growth. However, under optimum circumstances, mold spores can latch onto any surface, including those electronics. When faced with moldy electronics, cleaning the spores is a simple process.
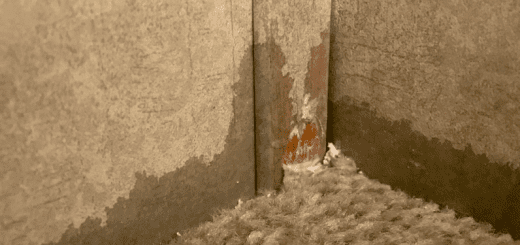
Although mold growth is not typical on electronic devices, ideal environmental conditions may facilitate mold growth. Dampness, oxygen, and warmth are excellent nutrient sources for mold, and if electronics provide prolonged sustenance, mold spores will rarely deny the chance for a nutritious meal.

Mold infestations are uncommon on electronics because these devices primarily consist of inorganic parts. Mold requires an organic substance, such as wood, paper, or carpet, to feed upon. Plus, electrical components do not hold moisture, as do wood and other organic matter.
Personal computers, for instance, are built primarily with various metals. Copper wiring is necessary to produce the computers’ circuit boards. Batteries require lithium. Screens are composed of glass. Microchips are made with silicon. Inorganic materials like these do not facilitate mold growth.
Even electronics will be at high risk for mold growth under dire circumstances, like unanticipated property floods. Additionally, frequent condensation that surreptitiously forms inside electronics left unused for lengthy periods of time is a reliable nutrient source for mold colonies.
Electronics operate with fans to cool their motors. As these fans draw in air, they also suck in dust particles. When the electronic device is left in an area where moisture is prevalent, the dust particles serve as ample nourishment upon which the hungry mold spores feast.
Certain electronics are not manufactured with built-in fans, so they generate large amounts of heat. Electronics that emit warmth and are simultaneously placed in an area that runs rampant with moisture attract mold colonies. Again, warmth and moisture lead to an unsightly outbreak of mold.
Cleaning certain electronics is a delicate process since these devices cannot be exposed to large amounts of water or moisture-laden cleaning solutions, like vinegar and bleach. In such instances, withdraw all moisture from the device so that the mold spores expire from thirst.
Sensitive electronics, like laptops and computers, that erupt with mold should be immediately cleaned by a professional. Attempting to thoroughly clean these fragile devices may unwittingly lead to destroying them. However, various other electronics may be safely cleaned at home via the following steps.
Step 1: Unplug the device
Before working on any electronic device, it is critical to cut power to it. Introducing water to electronics while they are fully operational will lead to an unwanted case of electrical shock. If the device functions on battery power, remove all the batteries.
Step 2: Move to a ventilated area
Once the device has zero electrical power running through it, relocate the electronics to a well-ventilated space. A garage, patio or another outdoor area will work effectively. If it is impossible to move the electronics, increase ventilation by opening the windows and doors.
Step 3: Wear a mask
Working on a device teeming with mold spores is dangerous to an individual’s health. Prevent the inhalation of airborne mold spores by wearing a mask, such as a standard dust mask or respirator mask, which are readily available from stores. A mask also helps to prevent breathing in dust particles.

Step 4: Vacuum
A HEPA vacuum is ideal for suctioning out dust from the delicate interior parts of the electronics, including those along the ventilation fans. The HEPA-certified vacuum features a fine filter that prevents airborne mold spores from being redistributed throughout the vicinity.
Step 5: Blow compressed air
Vacuuming should eliminate any loose dust particles without disturbing the electronics’ interior mechanisms. Next, use a can of compressed air to dislodge mold particles. Use the vacuum again to suction out loosened mold spores. Repeat this process until the mold is cleaned.
Step 6: Mix a cleaning solution
An effective cleaning solution may be prepared by mixing one-part white distilled vinegar with two parts water. Alternatively, use a mild bleach solution. Apply the solution only to parts of the electronics, such as the outer shell that will not be adversely affected by minor amounts of moisture.
Step 7: Wipe away mold
This step is feasible for equipment that is not subject to damage if exposed to moisture. Carefully remove the device casing. Use a cloth dampened with the prepared cleaning solution to wipe the casing and remove the mold. Be cautious and avoid wetting any wires.
Mold may be lodged in crevices or tiny compartments inside the electronic device. Access these hard-to-reach areas with a cotton swab dipped in the vinegar cleaning solution. Or, dip the swab in a mild bleach solution to kill the mold spores effectively. Certain disinfectant sprays will prevent mold growth.

Step 8: Dry the device
Once the electronic device has been wiped down and the mold removed, it is important to thoroughly dry the equipment. A towel can be used to whisk away any remaining surface moisture. Take care to wipe monitors and screens with a soft cloth.
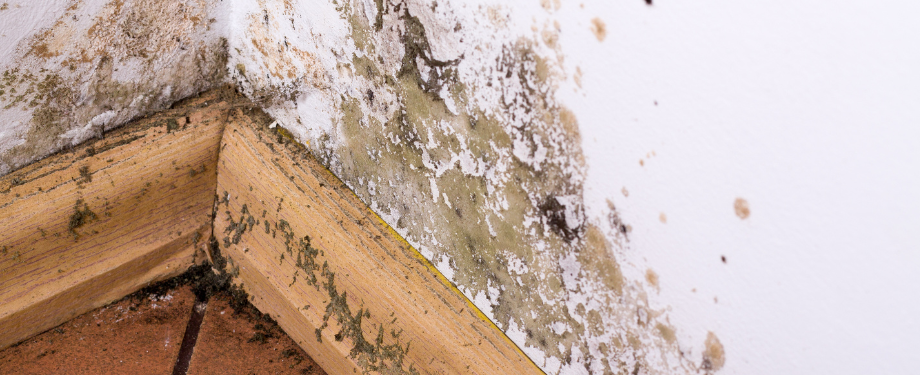
An infiltration of mold can leave home and business owners scrambling for immediate cleanup. When mold has invited itself in, consult a professional mold remediation company to clean up the mess. These professionals are prepared to tackle any sizeable mold infestation promptly and efficiently.
Highly trained and experienced mold remediation technicians will perform air quality sampling, seal off the affected area, use air scrubbers to dislodge the spores, and thoroughly clean the premises of mold. They utilize containment barriers to ensure mold spores do not contaminate other rooms on the property.
About Vince Sandri
Vince Sandri is a content writer and blogger with more than 12 years of experience. His expertise is in creating content related to disaster restoration, including information about preventing and reacting to natural disasters like flooding, water damage, fire and smoke damage, mold growth, storm damage and more.
Vince has been the main contributor to RestorationMasterFinder.com since 2014. Over that time, he has written numerous service pages and blogs for disaster restoration providers featured on RestorationMasterFinder.com. Vince has done extensive research and covered a wide range of topics relating to disaster restoration to help homeowners, business owners, and property managers better protect their property. He understands the problems that disasters like flooding, fire, smoke, and mold can cause as well as the best ways to respond to these issues to limit the damage.
Vince completed his Bachelor of Arts degree at Aurora University and his master’s degree at DePaul University. He has been writing SEO website pages, blogs, and press releases since 2012. Vince is also a musician and can be seen playing in the Chicago, IL area.